Useful Collection of Mac Terminal Commands to Know
A terminal is an interface for communication between a computer and a user. Even if you haven’t encountered coding before, you might have seen developers inputting something on a black screen instead of writing code, and that’s the terminal.
If you’re a developer, you’ll end up using the terminal at least once. With the terminal, you can perform various actions just using the keyboard, and it can be useful even if you’re not coding. Today, I’m going to introduce some useful terminal commands for those who are new to or not familiar with the terminal!
※ What if you’re not using macOS?
The title says ‘Mac terminal commands,’ but since Unix-based operating systems have similar commands, you can use them in most operating systems except for Windows. Also, some commands can be used in Windows as well.
※ Reference: CLI and GUI?
When studying computers or using the terminal, you often come across the terms CLI and GUI. First, CLI (Command Line Interface) refers to an interface based on command-based operations in the terminal, where you manipulate the computer through text, rather than using a mouse or other graphical means. On the other hand, GUI (Graphic User Interface) refers to a graphical-based user interface where you manipulate the computer using a mouse on the screen, unlike CLI.
0. Using the Terminal
First, let’s try running the terminal! The terminal is already installed by default on your operating system, so you don’t need to install it separately. If you’re a Mac user, you can press command + space and type “Terminal” (if it’s not the Korean version) to launch it.
※ What if you’re a Windows user?
Windows users cannot use the exact same commands we will cover later. However, if there are some of you who just want to run the terminal before learning the commands, let’s take a look at how to do it. Windows users can type “cmd” in the Windows search bar, and you will see an app called “Command Prompt.” You can think of this program (Command Prompt) as the terminal in Windows.
1. Navigating
First, let’s look at the commands related to the most fundamental aspect of operating a computer, “navigation”!
ls: Checking Files/Folders in the Current Directory
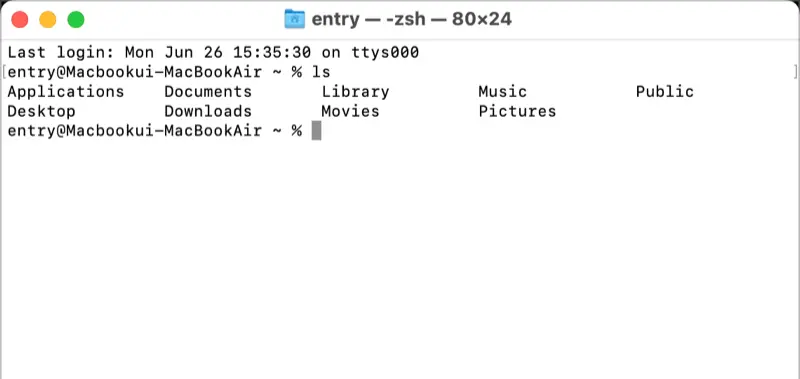
ls stands for “list,” and it’s a command to check the files and folders in your current location. When you enter ls and press Enter, you will see the names of various files and folders that exist in the current directory.
pwd: Printing the Current Path
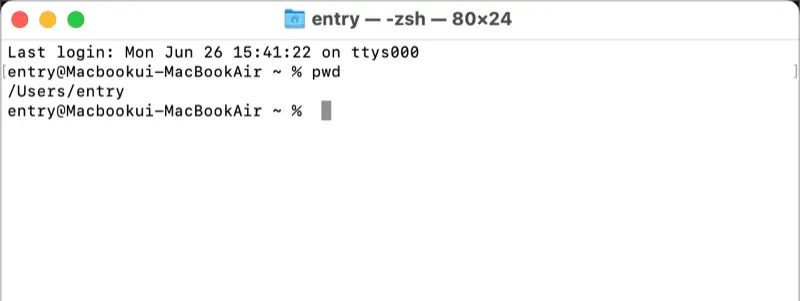
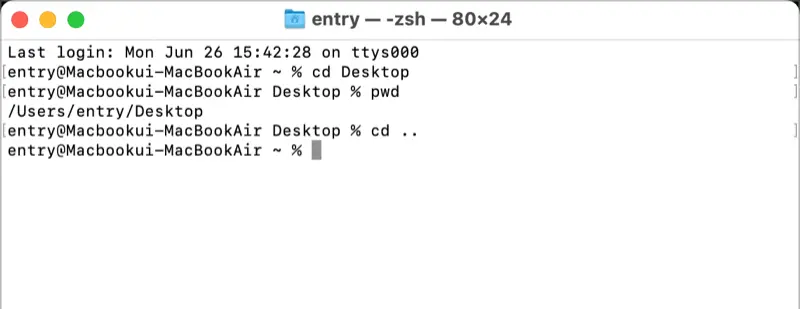
pwd stands for “print working directory,” and it’s a command that displays the current directory you are in. As you can see in the screenshot below, it shows that the current path is the “jaeha” directory located in the “Users” directory, which is the top-level directory.
cd: Changing Directories
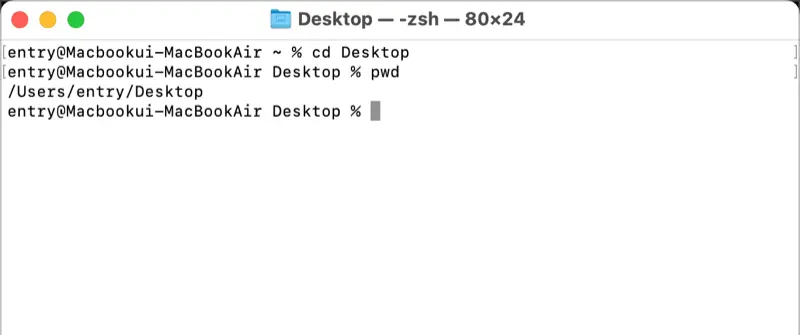
cd stands for “change directory,” and it’s a command used to navigate through paths. Let’s move to the “Desktop” folder among the various folders and files that appeared when we used the ls command! When you enter cd Desktop, the current path will be displayed where you enter the commands, and you can confirm that the current path has been modified by entering pwd.
If you want to move outside the folder, you can enter cd ..! Can you see that we have returned to the previous path?
2. Managing Files/Folders
When using a computer, it’s not just about navigating into folders. You also need to create and modify files and folders. Let’s take a look at how to manage files and folders using the terminal.
touch: Creating a File
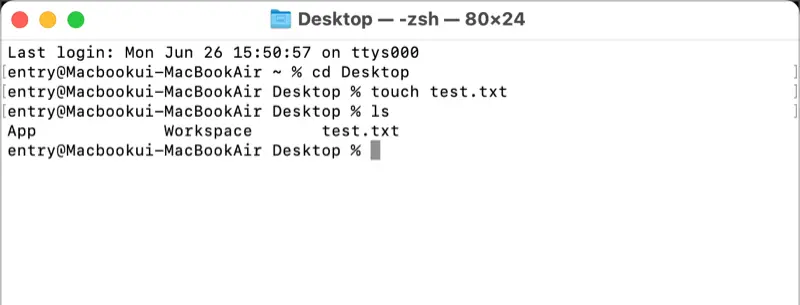
The touch command is used to create a file. Simply specify the file name after touch. For example, I created a file called test.txt. You can use the ls command to verify that the file has been successfully created.
mkdir: Creating a Folder
The mkdir command stands for “make directory” and is used to create a new folder. I created a folder called test. You can use the ls command to verify that the folder has been successfully created.

cat: Viewing a File
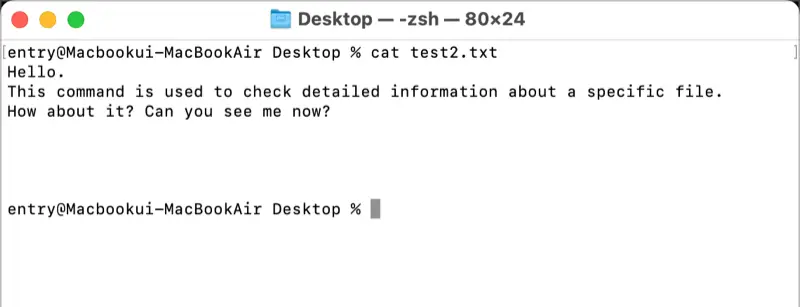
The cat command, short for “concatenate,” is used to view the contents of a file. I created a temporary file called test2.txt. By using the command cat test2.txt, you can see the contents of the file displayed.
rm: Deleting a File
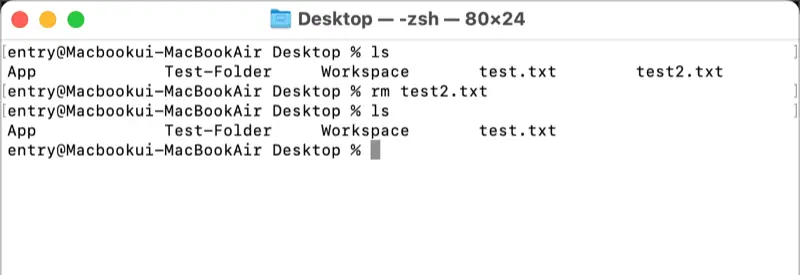
The rm command stands for “remove” and is used to delete a file. Let’s try deleting the test2.txt file. After deleting it, if you run the ls command, you will see that the test2.txt file is no longer there.
rmdir: Deleting a Folder
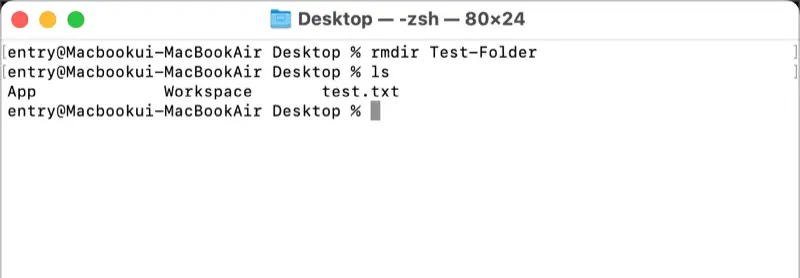
The rmdir command stands for “remove directory” and is used to delete a folder. Let’s delete the test folder we created earlier.
cp: Copying Files/Folders
The cp command stands for “copy” and is used to copy files or folders. You can specify the file/folder to be copied and the desired destination path/name after cp. For example, I copied test.txt to test2.txt.

mv: Moving Files/Folders, Renaming Files
The mv command stands for “move” and is used to move files or folders. Let’s create a folder called test and move the test.txt file into that folder. After the mv command, specify the file to be moved and the target directory in that order!

Furthermore, the mv command can also be used to rename files. After mv, specify the current file name as the first argument and the desired new file name (not a folder) as the second argument. Let’s rename test2.txt to test_changed.txt.

3. Other Useful Commands
In addition to the previously discussed commands, there are various other commands worth mentioning. Let’s take a look at a few more.
clear: Clearing the Terminal
The clear command is used to clear the terminal. When you use commands like ls, the terminal screen can become cluttered and messy. By entering the clear command, you can make the terminal window clean as if it were just opened.
history: Viewing Previously Used Commands
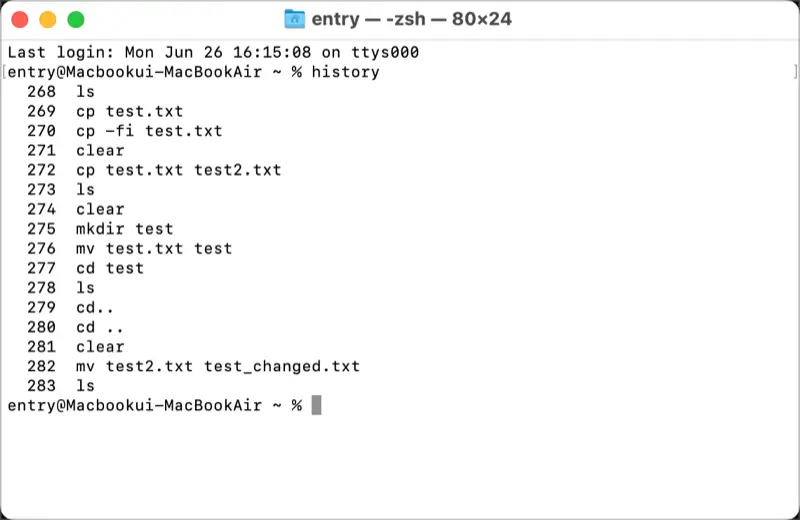
The history command allows you to view previously used commands. When you enter history and press Enter, a list of numbers and commands will be displayed. You can use an exclamation mark (!) followed by the number to execute a specific command from the history.
man: Viewing Command Manuals
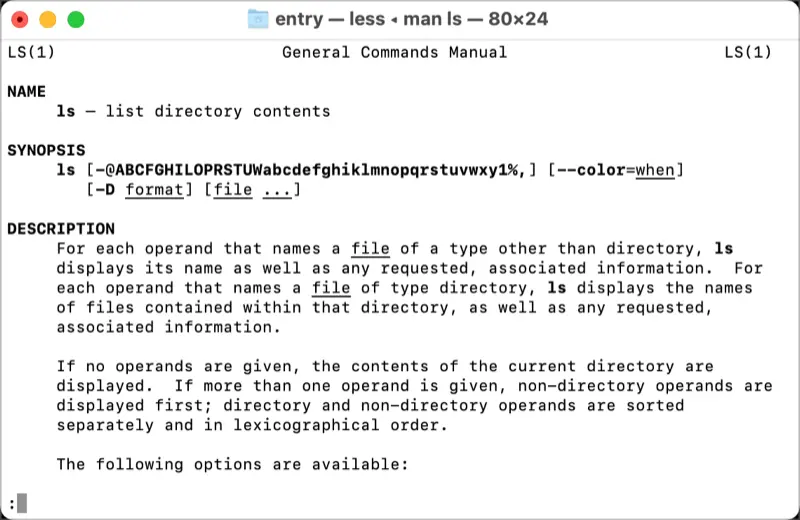
The man command, short for “manual,” allows you to view the manual of a specific command. Simply enter man followed by the command you want to explore. Let’s try viewing the manual for the ls command we learned earlier. When executed, you will see various information about the command, including its name, description, options, and more. To exit the manual and return to the original screen, press the letter ‘q’ which stands for quit.
Today, we’ve explored several commands, and as you can see, using the terminal is not as difficult as it may seem.